# Helvia Release 5.38.0
### 1. Console Updates
#### 1.1 User Feedback option in Default Responses
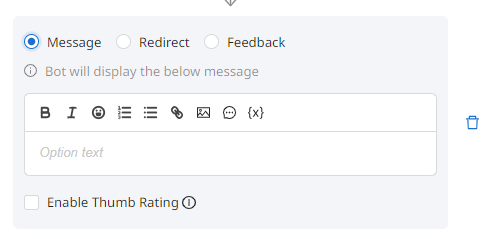
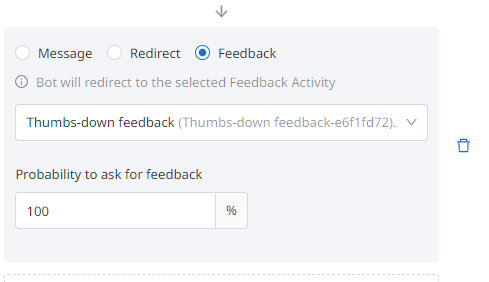
Similar to the available options within the Automated Answers, the Default Responses will now provide the option 'Feedback' as a radio button.
Selecting 'Feedback', gives you the option to link the Default Response with a 'Feedback' activity and set the probability % to ask users for feedback.
#### 1.2 Rendering question options as cards
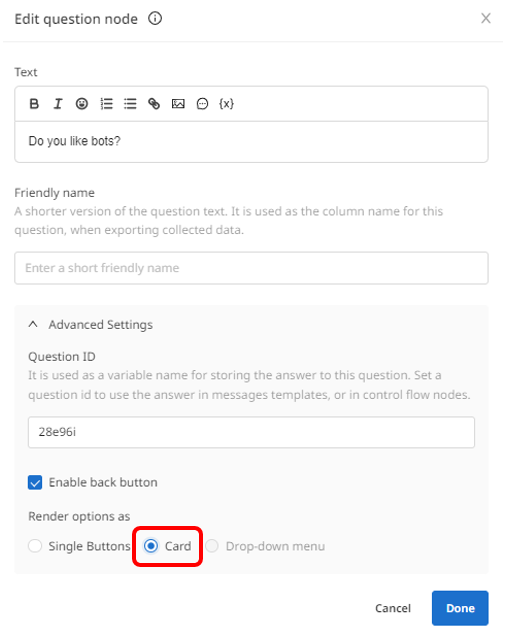
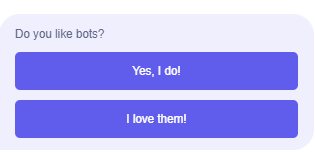
When editing a question node, you will be able to choose to render the response options either as buttons or as a card. To render a question as a card, click the 'Edit' button on the question node, open the 'Advanced Settings' and select the 'Card' radio button in the rendering options.
Rendering options as a card, will group the question and the options together and will make the options available even after the end-user has made a selection. So when the end-user has selected one of the options and then scrolls up in the conversation, they will be able to see the available options.
#### 1.3 Knowledge Base configuration within the Helvia console
Organization admins will be able to configure Knowledge Bases (KB) within the Helvia console to be used in a bot's behavior. Knowledge Bases will be available across the organization and will be usable by any bot within the organization.
Admins can create their own Knowledge Bases and add new articles. Within a Knowledge Base, admins will be able to also edit or delete existing articles.
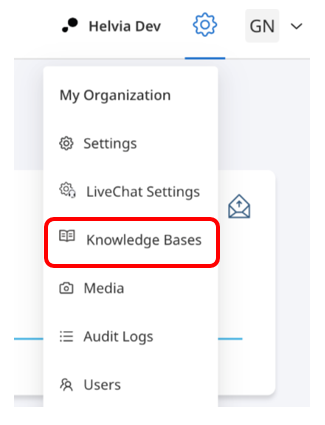
To create a Knowledge Base, click the gear button on the top right corner and select 'Knowledge Bases'.
Click the 'Add New KB' button from the top right corner.
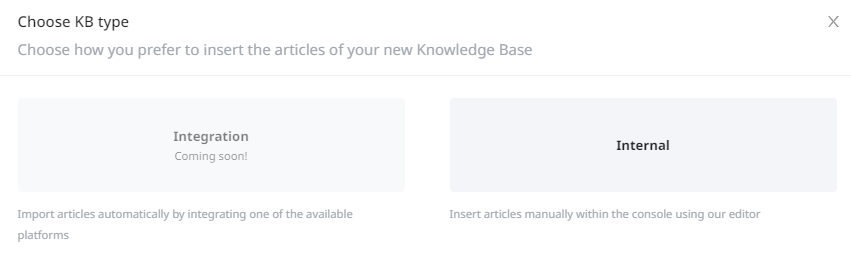
In the pop up window, select 'Internal'.
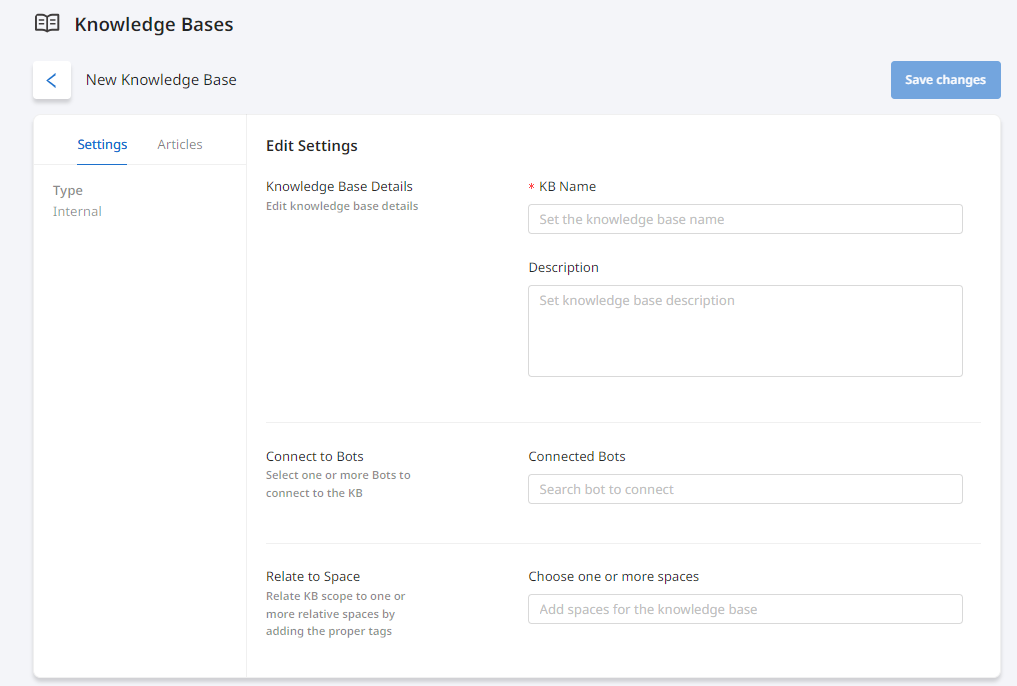
Configure the Knowledge Base settings, including the name, description and the bots you would like to connect it to, and save the changes.
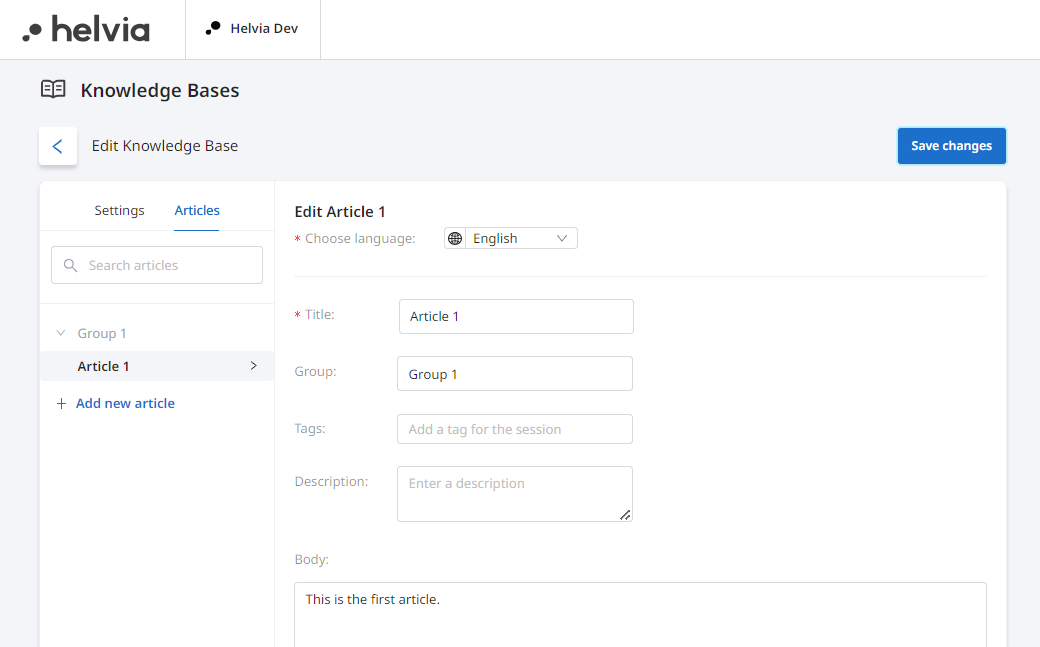
Once this is done, go to the 'Articles' tab to add articles. Select the language, add the article title, the group it belongs to and the article body. You can also add tags and a description. Once finished, save the changes.
In the Knowledge Bases page, you will be able to view the list of your Knowledge Bases and edit their settings.
#### 1.4 Configuring Knowledge Bases in the bot's behavior
Bot admins will be able to configure the Knowledge Bases that will be used by a specific bot in the bot's 'Behavior' tab. Knowledge bases can be used in combination with the Automated Answers or independently. So the bot's content can include a combination of Activities, Automated Answers or Knowledge Base articles elements.
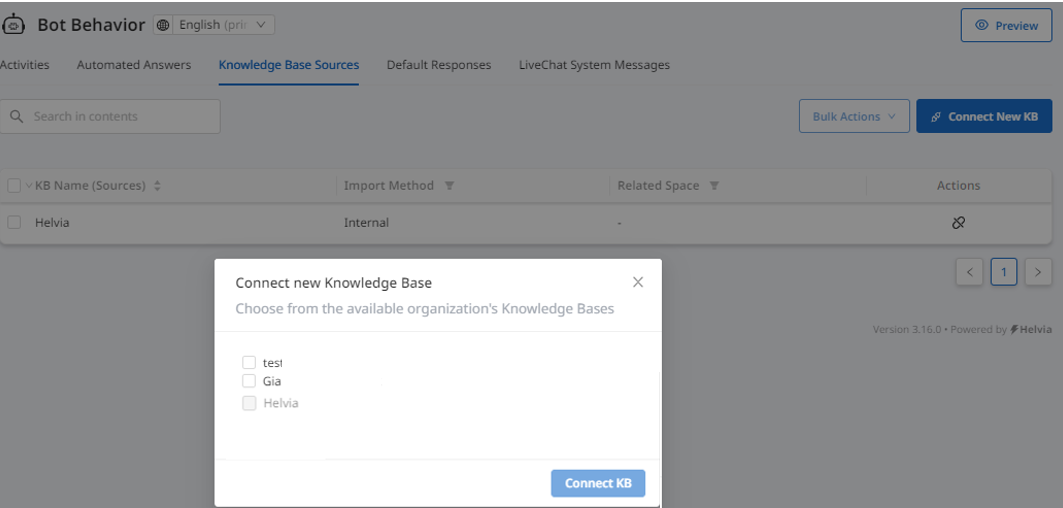
To configure the Knowledge Bases within a bot, go to the 'Behavior' and select the 'Knowledge Base Sources' tab. Click the 'Connect New KB' button and in the pop up window select the Knowledge Bases you would like to connect to the bot. Once finished, click the 'Connect KB' button.
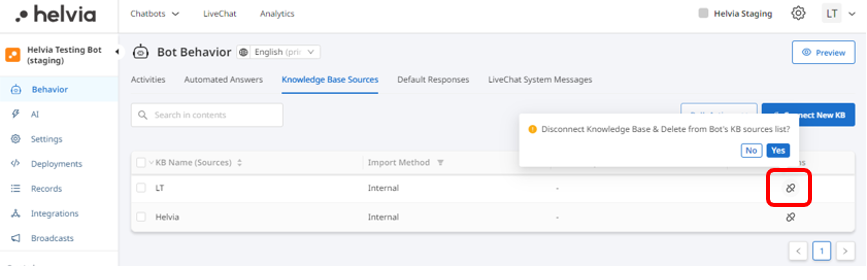
To disconnect a Knowledge Base from a chatbot, click the 'Disconnect' button from the 'Actions'.
#### 1.5 NLP Pipelines setup within the console
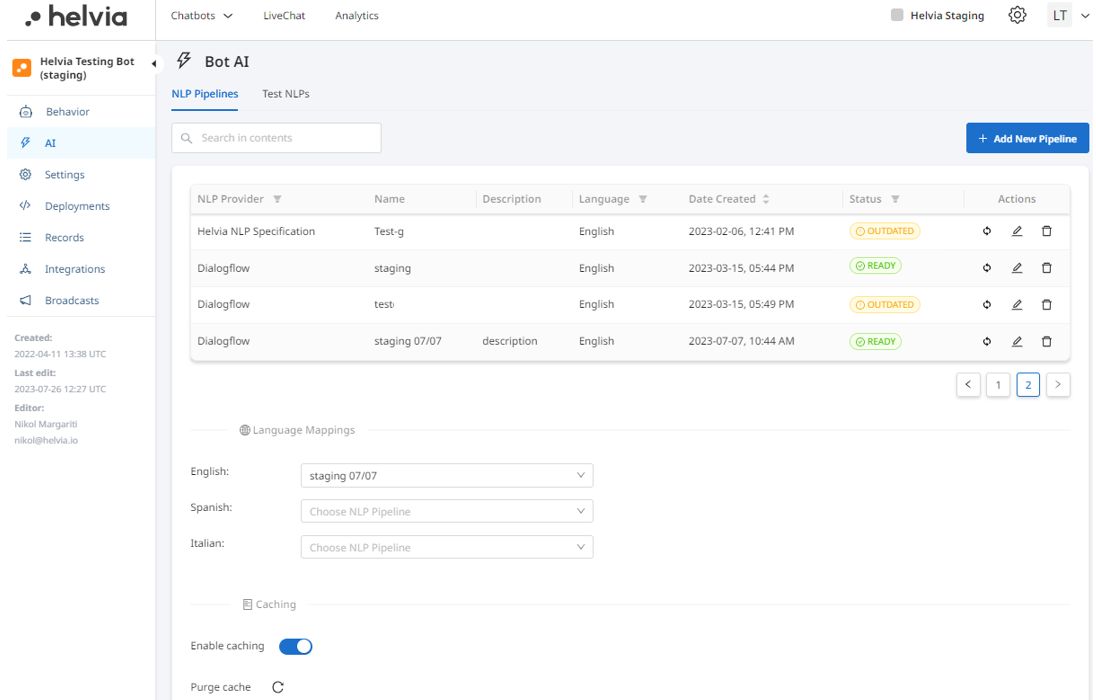
Bot admins will be able to navigate to a newly created 'AI' tab, by clicking 'AI' from the bot's left hand side menu, where they will be able to create, edit, train, delete an NLP pipeline or match an NLP pipeline with a chatbot's language.
{% hint style="info" %}
The NLU settings will no longer be available in the bot's settings and all related NLP settings will be located in the new 'AI' page. In addition, the 'Test NLU Models' page will be accessible in the 'Test NLPs' tab within the 'Bot AI' page.
{% endhint %}
**1.5.1 Creating an NLP pipeline**
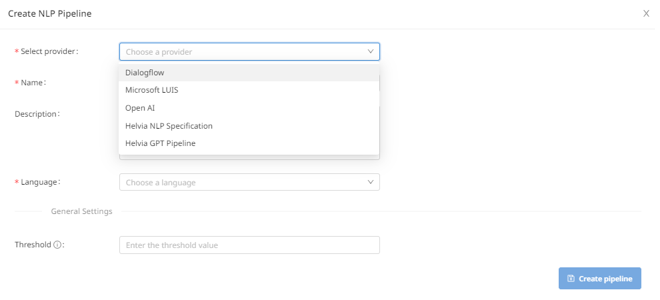
To create an NLP pipeline, go to the bot's AI page and click the 'Add New Pipeline' button on the top right.
Select the provider from the dropdown list, fill out the required information and click the 'Create pipeline' button.
Once created, the new pipeline will be shown in the list of available NLP pipelines.
**1.5.2 Training an NLP pipeline**
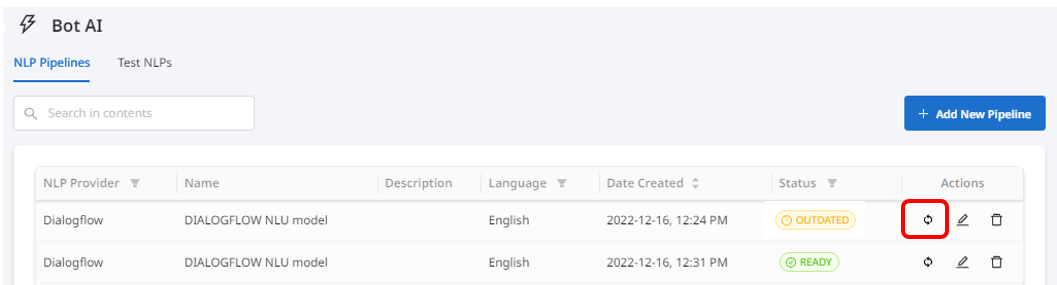
To train an NLP pipeline, click the 'Train' button under 'Actions'. Training a pipeline will make it ready for use and will then have the status 'Ready'. If the pipeline has the status 'Outdated', it means that changes have been made to the bot's content and the NLP pipeline needs to be trained to be up-to-date.
{% hint style="info" %}
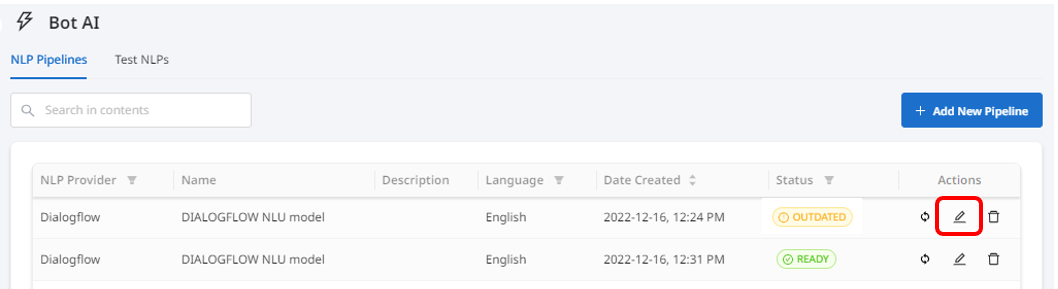
Note: if the NLP pipeline has the status 'Failed', you will need to check again the NLP pipeline configurations, by clicking the 'Edit' button.
{% endhint %}
**1.5.3 Editing and deleting an NLP pipeline**
To edit a pipeline, click on the 'Edit' button under 'Actions'.
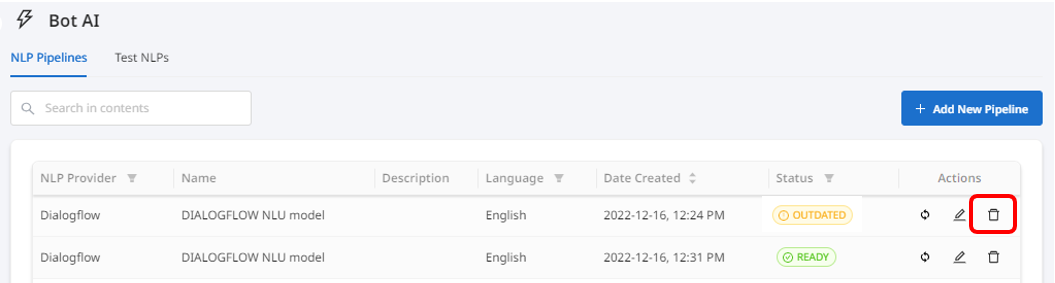
To delete a pipeline, click on the 'Delete' button under 'Actions'.
**1.5.4 Matching an NLP pipeline with a bot's language**
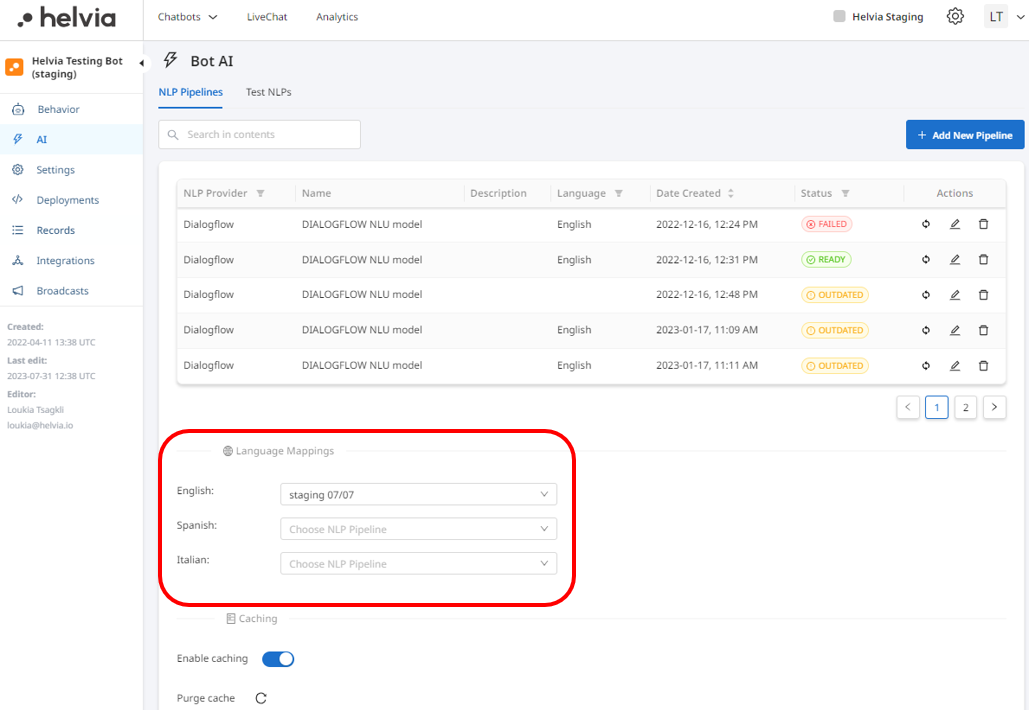
To match an NLP pipeline with a bot's language, go to the 'Language Mappings' section in the NLP Pipelines page and select the NLP pipeline per available language.
{% hint style="info" %}
Note: Only the related pipelines will be shown for each language.
{% endhint %}
### 2. LiveChat Updates
#### 2.1 Suggested categories on Canned Responses creation
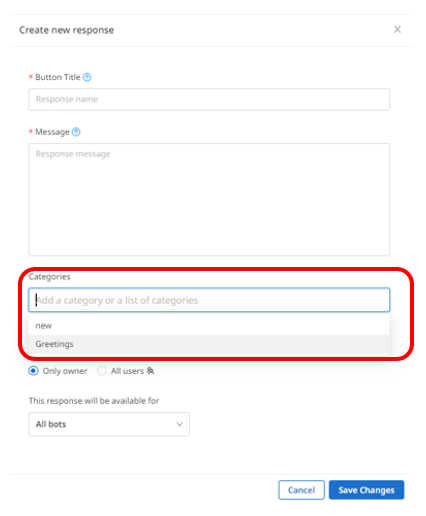
While creating a canned response, LiveChat admins will be able to either add a new category or choose from the existing ones.
#### 2.2 Search option in Automations
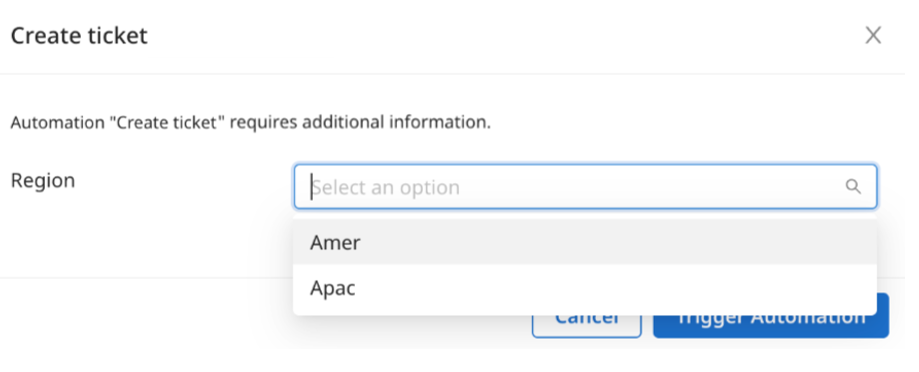
LiveChat agents will be able to also search when executing an Automation that has dropdown agent input.
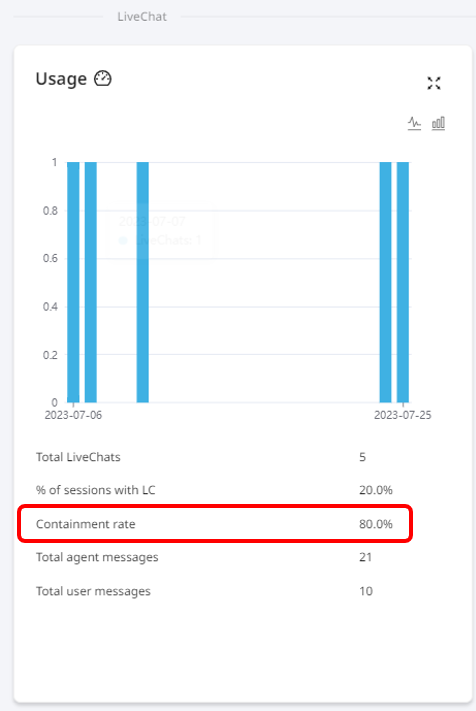
#### 2.3 'Containment rate' in LiveChat Analytics section
A new 'Containment rate' metric, will be added to the Usage graph in the LiveChat section of the Analytics. Containment rate measurement is a key performance indicator (KPI), which shows the percentage of total interactions that are fully handled by the chatbot without the need for transferring to a human agent.
---
# Agent Instructions: Querying This Documentation
If you need additional information that is not directly available in this page, you can query the documentation dynamically by asking a question.
Perform an HTTP GET request on the current page URL with the `ask` query parameter:
```
GET https://docs.helvia.ai/resources/release-notes/2023/helvia-release-5.38.0.md?ask=
```
The question should be specific, self-contained, and written in natural language.
The response will contain a direct answer to the question and relevant excerpts and sources from the documentation.
Use this mechanism when the answer is not explicitly present in the current page, you need clarification or additional context, or you want to retrieve related documentation sections.