# Helvia Release 5.25.0
### 1. **Console Updates**
#### **1.1 Activity analytics funnel table**
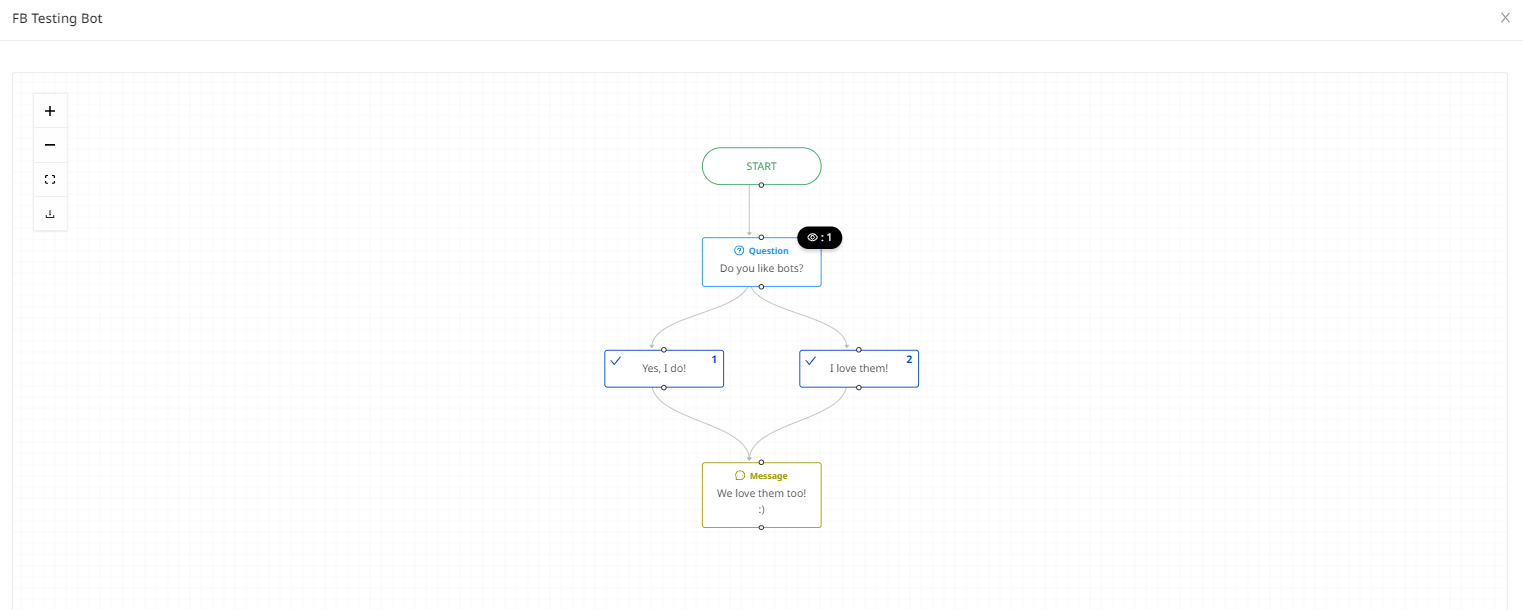
A new view has been added to the analytics, showing how many times a specific button within a decision tree has been accessed.
To access this view, within the [Helvia Console](https://console.helvia.io/), go to the Organization Analytics, on the Decision Tree section and click the 'View' icon of a specific activity.

A new window will then pop up, showing the activity elements and the number of appearances per question node. This graph is also downloadable.
#### **1.2 Deployments enhancements**
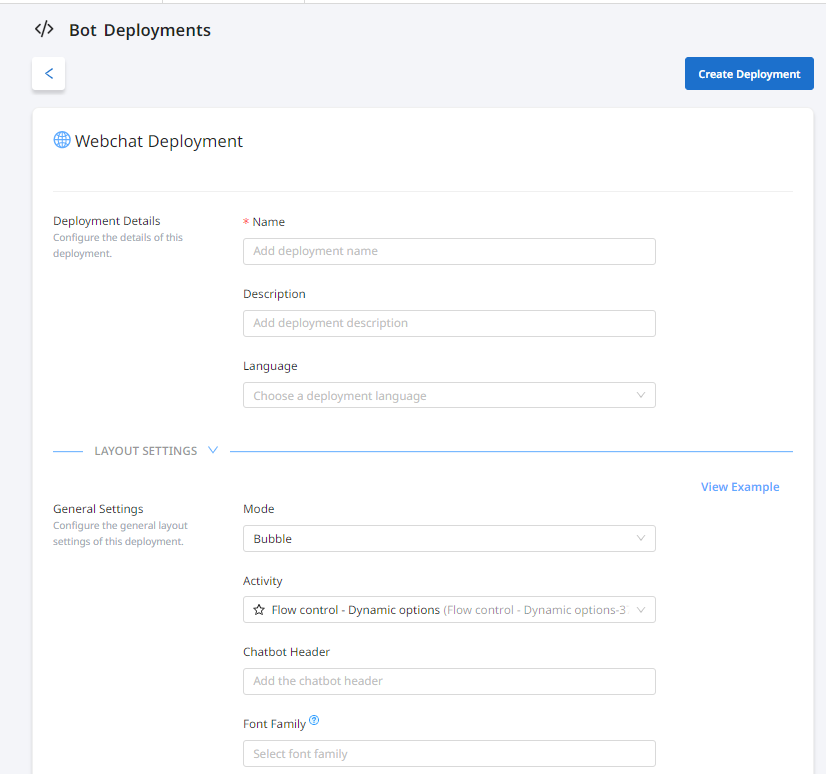
The 'Deployments' section in the console has been enhanced, enabling the creation of different deployments per medium or project, with the specific features required per deployment, including different languages, custom buttons and more.
To create a new deployment, go to the chatbot view, select 'Deployments' from the left hand side menu and then select one of the available options:
* Microsoft Teams
* Webchat
* Viber
* Messenger
* Slack
In the new window that will open, fill out the information required for your deployment and click 'Create Deployment'.
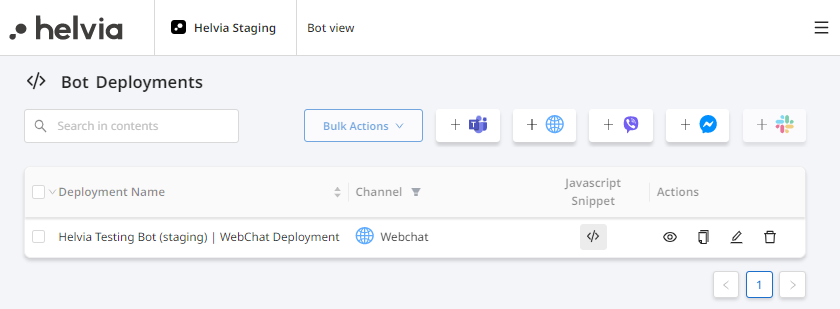
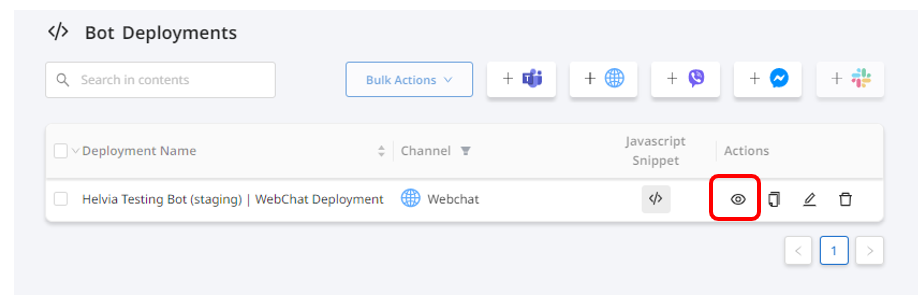
To test your deployment, go to the Deployments view, click on the 'View' button and test your chatbot in the browser window that will open.
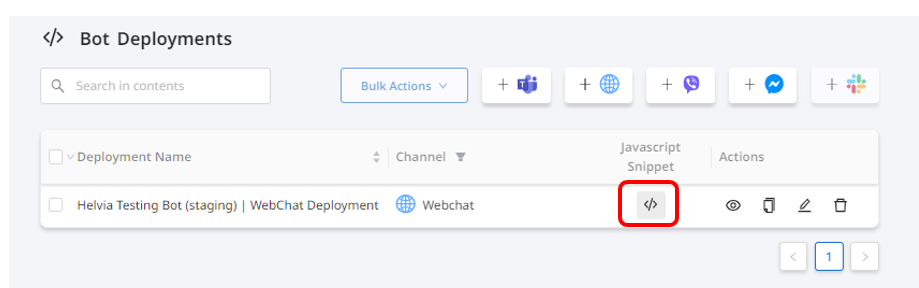
To get the snippet of your deployment, go to the Deployments view, click on the Javascript snippet and copy the code.
You can clone, edit or delete a deployment by clicking the available button next to each deployment in the Deployment view.
#### **1.3 Multilingual chatbots**
The console now provides the option to add more than one languages to the same chatbot deployment. The enabled languages include:
* English
* Greek
* Spanish
* Portuguese
* Italian
* French
* German
To select an additional language, go to the bot's Settings page and scroll to the Languages section. Check the language you want to add and move it to the box on the right by clicking on the right-looking arrow and click save.

Once you add another language, you will be able to edit the content by selecting the new language while editing the bot's activities, automated answers and LiveChat messages.
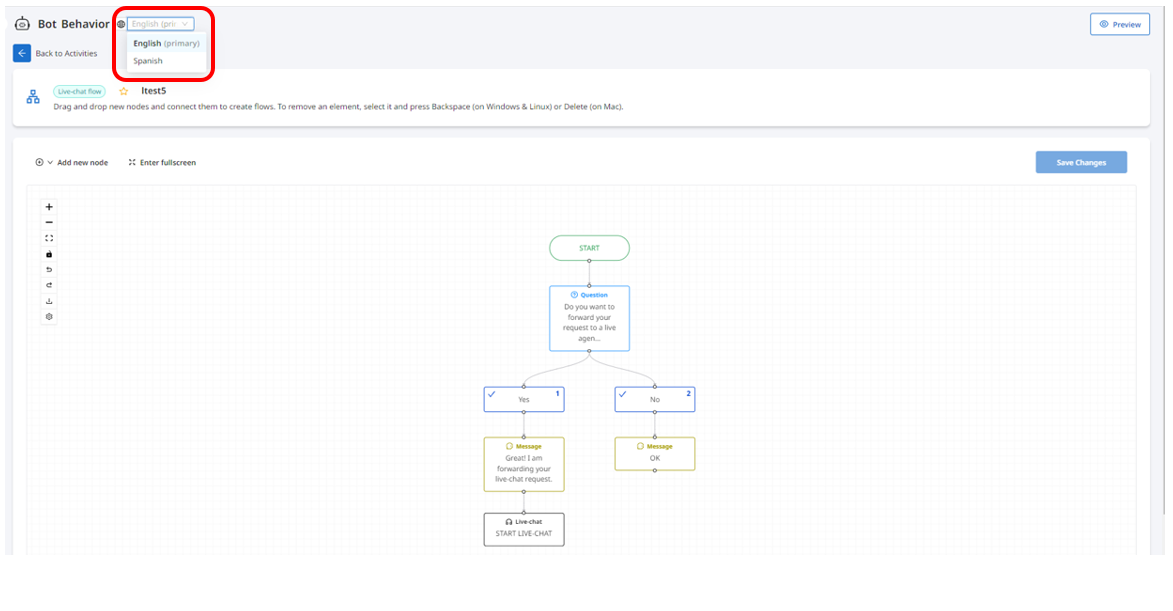
To edit the additional language in a flow, go the edit view of the flow and select the additional language from the drop down menu.
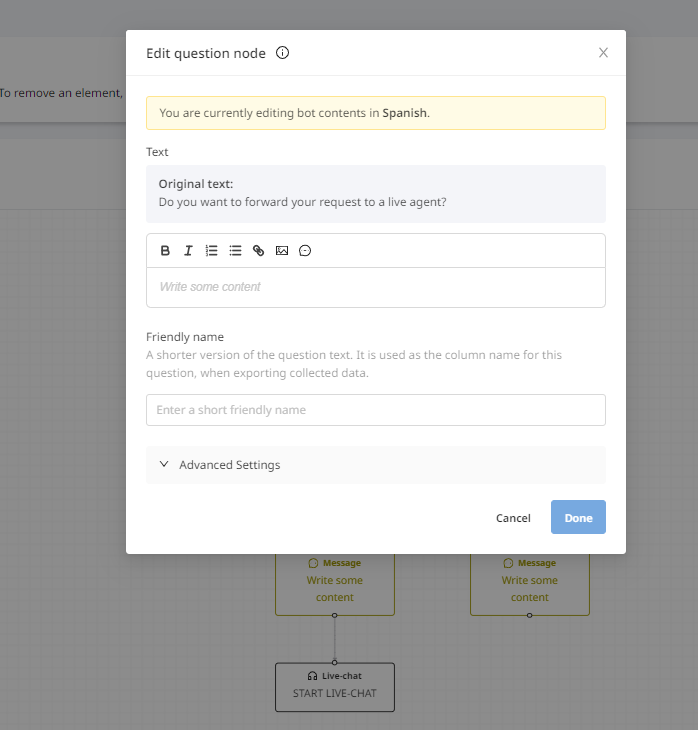
You will then need to click 'Edit' on each node of the flow, add the translated content in the pop up window and click 'Done'. The text in the primary language will be visible while editing, for easier translation management.
Please note that when you edit content in a language other than the primary one set for the chatbot, you will not be able to add/remove nodes from flowgraphs.
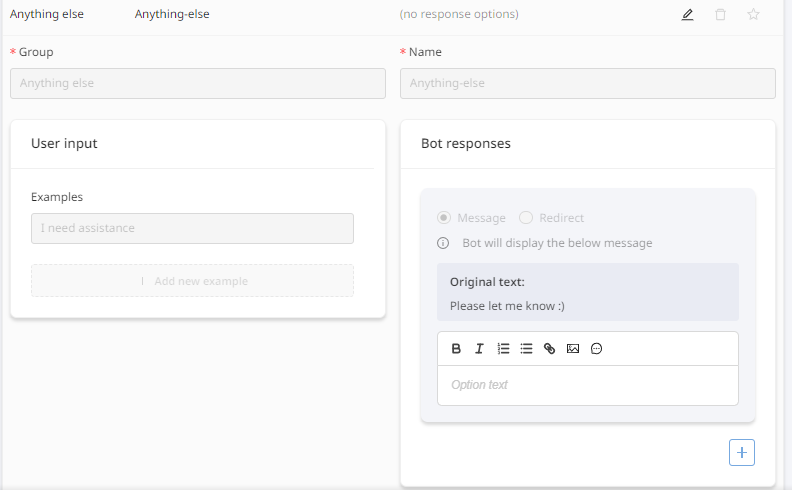
To add translations in automated answers, you will need to go the chatbot's 'Automated Answers' part of the behavior, select the additional language and then edit each answer to translate.
Note that only the responses can be translated. Training phrases are not editable and are automatically translated. In addition, when you edit content in a language other than the primary one set for the chatbot, you will not be able to add/remove responses.
To preview the chatbot in a language different than the primary one, go to the preview settings, select the preview language from the drop down an click 'Save'.

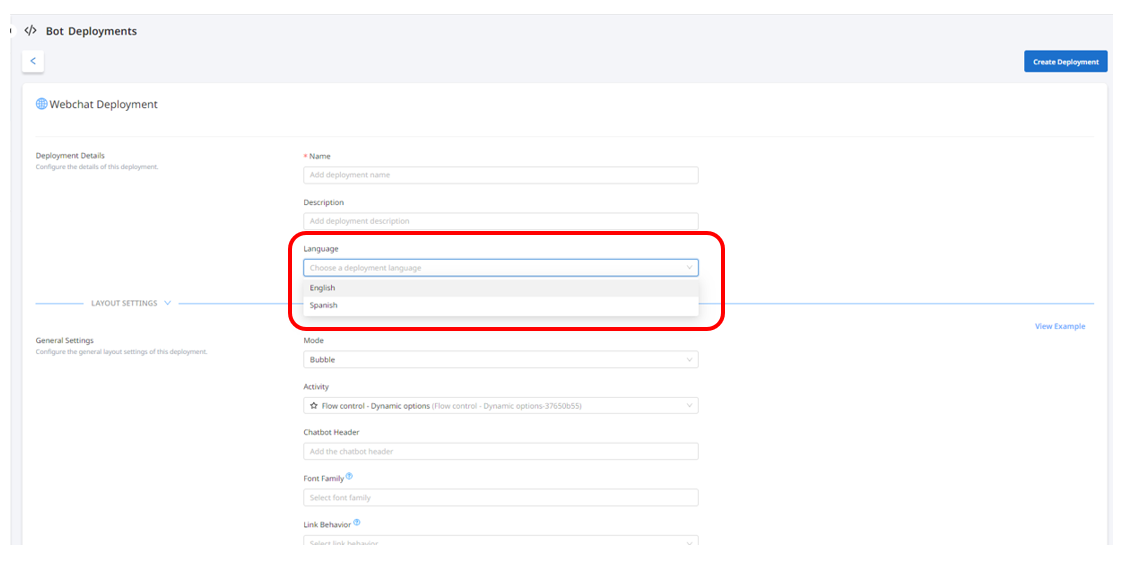
To deploy a chatbot in a language other than the primary one, create a new deployment for the required channel, as explained in section 1.2 of the release notes and select the language you want from the drop down list.
#### **1.4 System emails sender name**
Sender name of system emails from the Helvia console will be displayed as "Helvia Support".
#### **1.5 Show user status for user invitations**
When inviting a new user, the console admin will be able to see in the console if the invite was sent to the user and if the registration is pending, making it easier to manage users.
#### **1.6 Prompt user bubble**
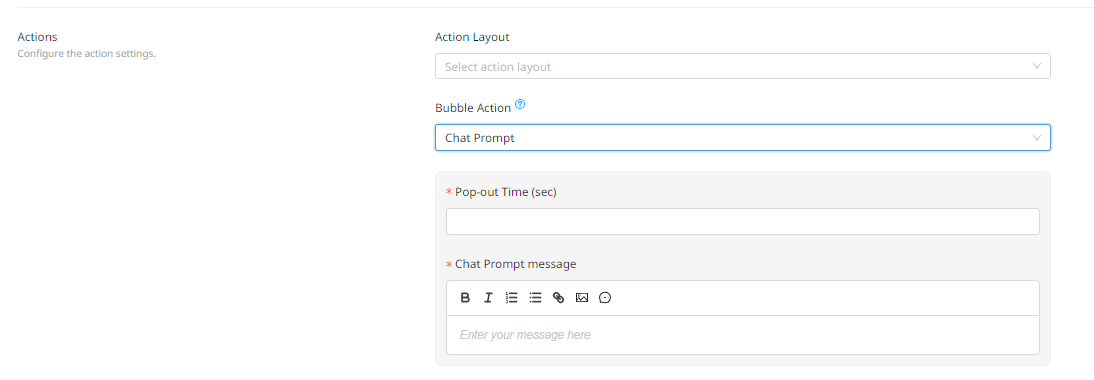
Console admins will be able to set the chatbot to prompt the users if they need help, after a configurable amount of time. This setting is available in the 'Actions' section of the webchat Deployment and only for the bubble mode.
To enable this, select 'Chat Prompt' from the 'Bubble Action' drop down menu and then add the the pop-out time and the chat prompt message.
#### **1.7 Setting for link behavior**
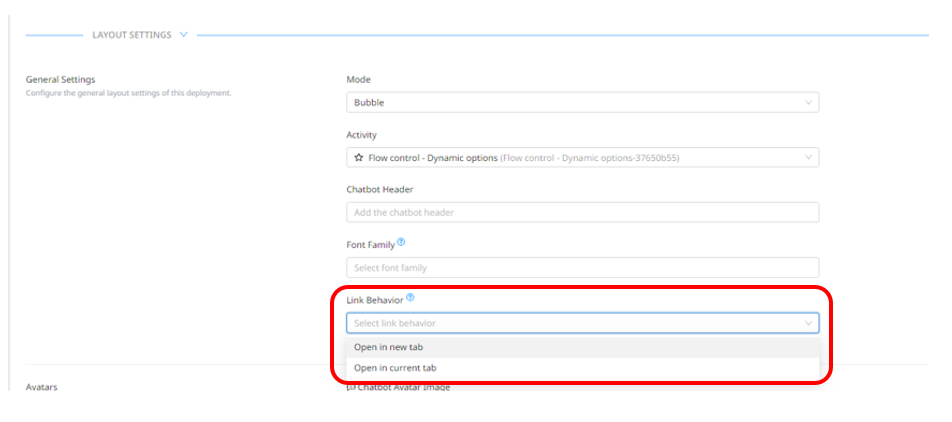
For webchat deployments a new setting has been added to control whether a link should open in a new tab or in the same one.
This setting is available in the 'General Settings' section of the webchat deployment, called 'Link Behavior'.
#### **1.8 Redesign of audit logs page**
The audit log page has been redesigned, with the email notifications now being available as a drop down list on the right hand side.
### **2. LiveChat Updates**
#### **2.1 LiveChat console redesign**
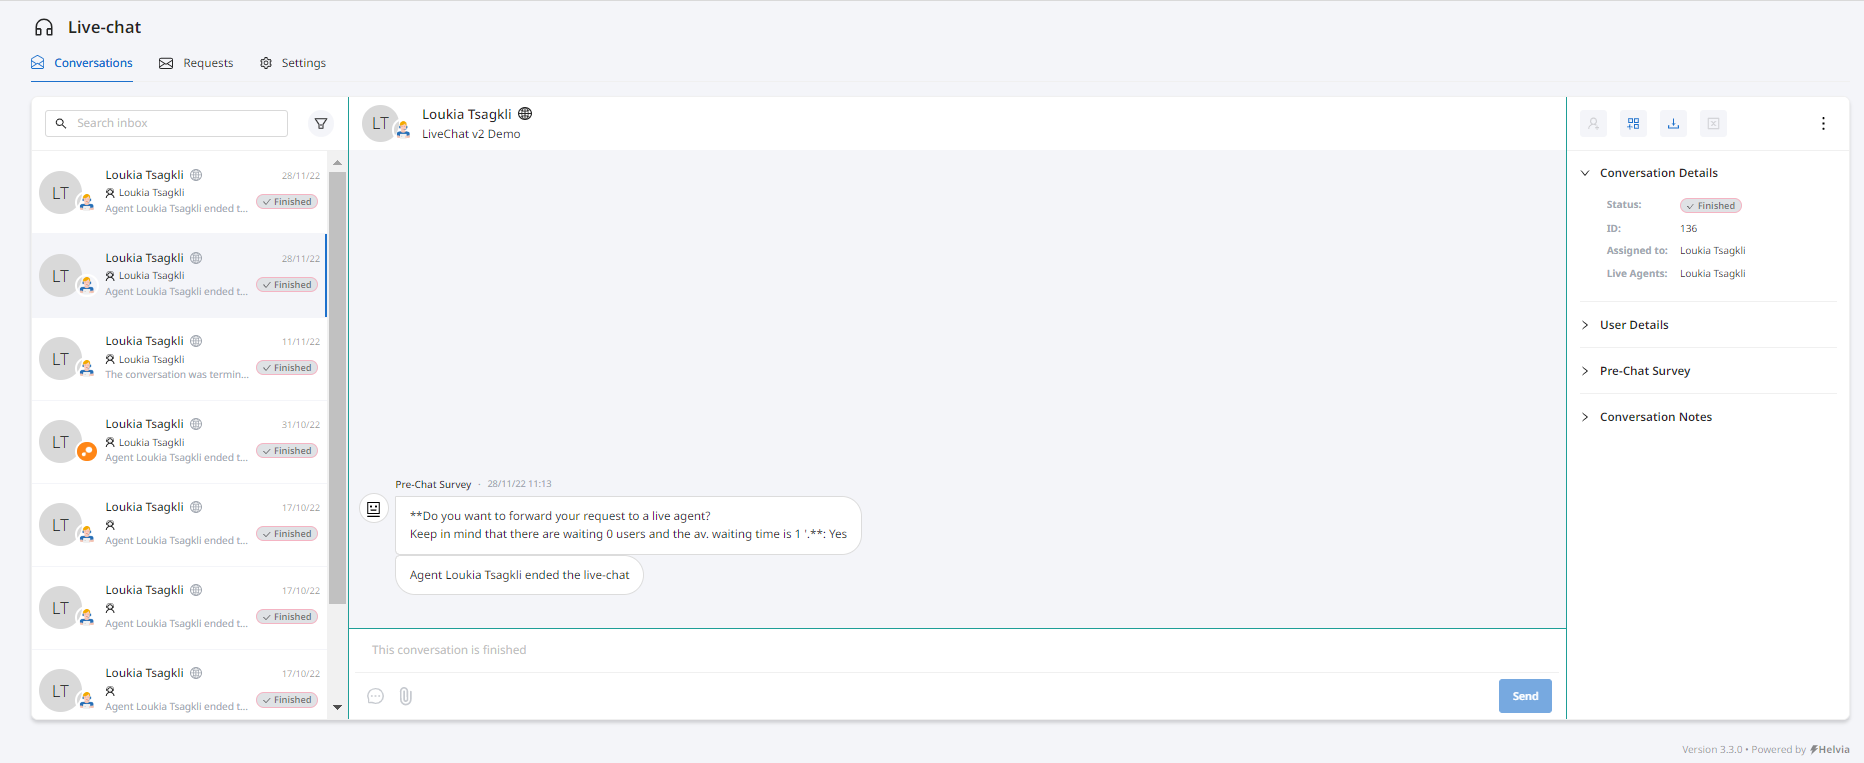
The LiveChat console has been redesigned to provide better user experience to the agents. The main changes include:
* The Conversations and Requests tabs are available above the conversation box
* The sound settings are now available in the Settings
* The search and filtering have been rearranged
* There is a new section next to each conversation that includes the buttons (Predefined Actions, Export Transcript, End conversation), plus Conversation Details, User Details, Pre-Chat Survey info and Conversation Notes
* The Predefined Responses are renamed to Quick Responses
#### **2.2 Option to use predefined actions in finished LiveChat conversations**
LiveChat agents will be able to trigger a predefined action in a finished conversation.
To trigger an action, go to a finished conversation and click on the 'Predefined Actions' button and select one of the available predefined actions.

#### **2.3 Custom input in predefined actions**
LiveChat agents will be able to add information manually before triggering a predefined action if they need to.
To add custom fields to make them available to the agents, edit the predefined action, click the 'Add field' button and fill out the required fields.
Please note that the Helvia team will need to be consulted for any required integrations for the custom fields.

When triggering a predefined action in the console, which contains custom fields, a popup will appear with a form with the fields you have defined.

#### **2.4 Showing typing indicator while the LiveChat agent types a message in console**
While a LiveChat agent is typing a message, they typing indicator will be visible to the end-user for better UX.
#### **2.5 Notification sound on enabling notification settings**
When enabling the LiveChat sound notification settings, the notification sound will play.
---
# Agent Instructions: Querying This Documentation
If you need additional information that is not directly available in this page, you can query the documentation dynamically by asking a question.
Perform an HTTP GET request on the current page URL with the `ask` query parameter:
```
GET https://docs.helvia.ai/resources/release-notes/2023/helvia-release-5.25.0.md?ask=
```
The question should be specific, self-contained, and written in natural language.
The response will contain a direct answer to the question and relevant excerpts and sources from the documentation.
Use this mechanism when the answer is not explicitly present in the current page, you need clarification or additional context, or you want to retrieve related documentation sections.